Winter Day Hiking Basics: Layers, Traction and Shorter Days8 min read
Winter hiking basics come down to three problems: staying warm without overheating, keeping your footing on ice and packed snow, and finishing before dark. None of them requires expedition gear. A day hike in January mostly needs the same pack you carry in October, plus a real layering system, the right traction for the trail surface, and a start time that respects a 4:30 p.m. sunset. This guide covers the layer setup that works for adults and kids, how to choose between boots, microspikes, and snowshoes, and the small planning changes that keep a short winter day from turning into a cold one. If you are building your pack from scratch, start with our family hiking checklist and add the winter items below.
The Three-Layer System: Base, Mid, and Shell
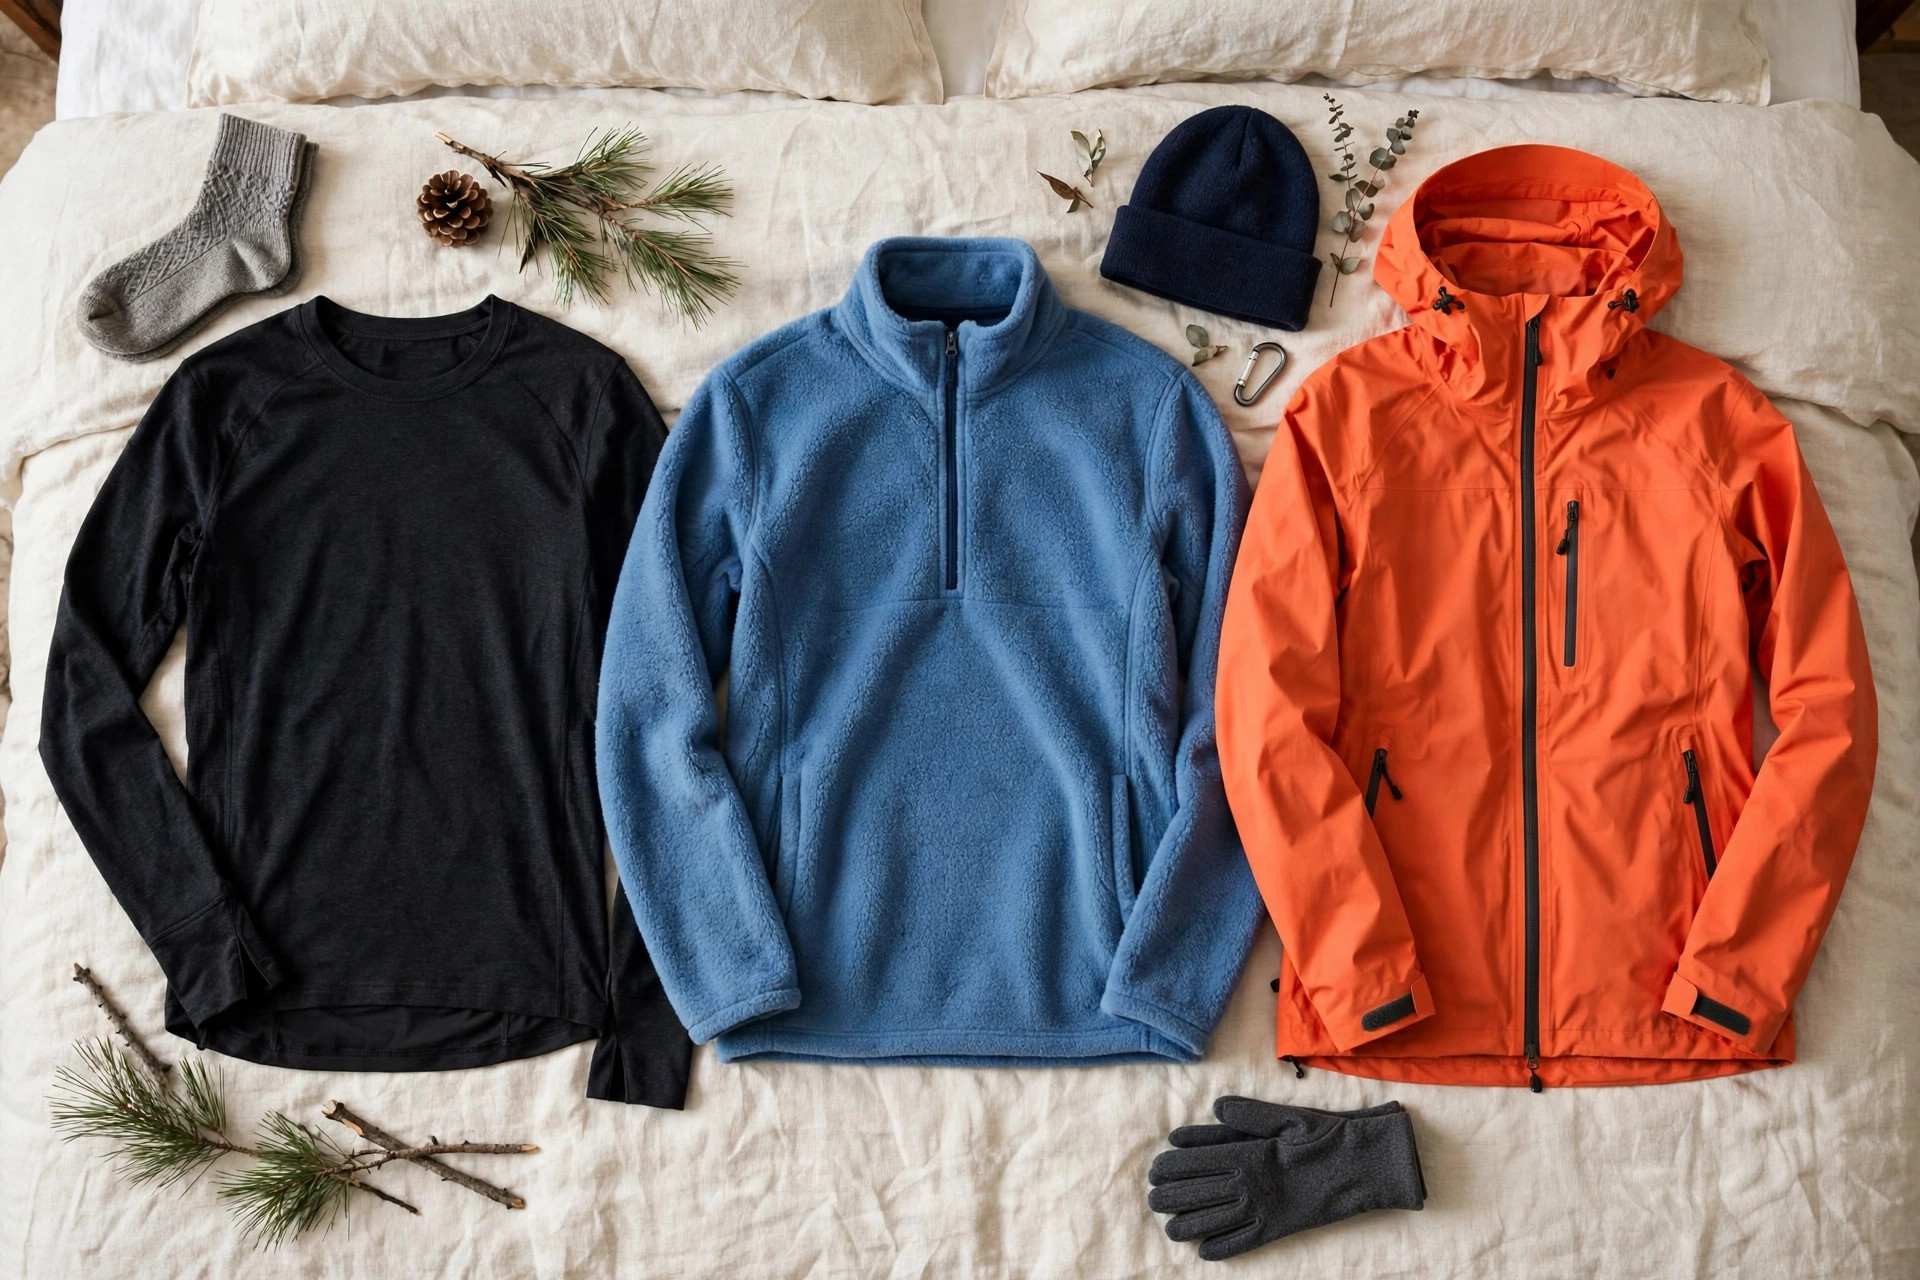
Layering works because each layer has one job. The base layer moves sweat off your skin, the mid layer traps heat, and the shell blocks wind and precipitation. When you heat up on a climb, you remove the mid layer. When you stop for lunch, you put it back on before the chill sets in.
Base layer: keep sweat off your skin
Choose merino wool or a synthetic fabric such as polyester. Both move moisture away from the body and keep insulating when damp. Cotton does neither. A cotton shirt absorbs sweat, holds it against the skin, and loses nearly all of its insulating value once wet. In cold weather that combination can pull heat away from a resting hiker fast, which is why experienced winter hikers repeat the saying “cotton kills.” The saying applies to socks and jeans as much as to shirts.
Mid layer: trap the heat
Fleece and lightweight puffy jackets are the common choices. Fleece keeps working when damp and breathes well on climbs. A synthetic or down puffy packs smaller and is warmer for its weight at rest stops, though down loses insulation when soaked. Many hikers carry fleece for moving and a puffy for stops.
Shell layer: block wind and weather
A waterproof-breathable rain jacket and rain pants usually double as the winter shell for day hikes. The shell’s main job is stopping wind, which strips heat far faster than still cold air does. Pit zips or vents help here, because a shell that traps sweat will soak your mid layer from the inside on a long climb.
What to Wear at Different Temperatures
Conditions change fast with elevation and wind, so treat these combinations as starting points rather than rules. The pattern to copy is the adjustment: start slightly cool, add the puffy at stops, and never let sweat soak the base layer.
| Temperature | Base layer | Mid layer | Shell and extras |
|---|---|---|---|
| 30 to 40°F, active hiking | Lightweight merino or synthetic top and bottoms | Light fleece, carried puffy for stops | Rain shell if windy or snowing; light hat and gloves |
| 15 to 30°F | Midweight base layer top and bottoms | Fleece plus puffy jacket worn most of the day | Shell jacket and pants; warm hat, insulated gloves, neck gaiter |
| Below 15°F or exposed and windy | Midweight to heavyweight base layer | Fleece plus puffy, sometimes two mid layers | Shell top and bottom; balaclava or face covering, glove liners under mittens, insulated boots |
Traction: Boots, Microspikes, or Snowshoes
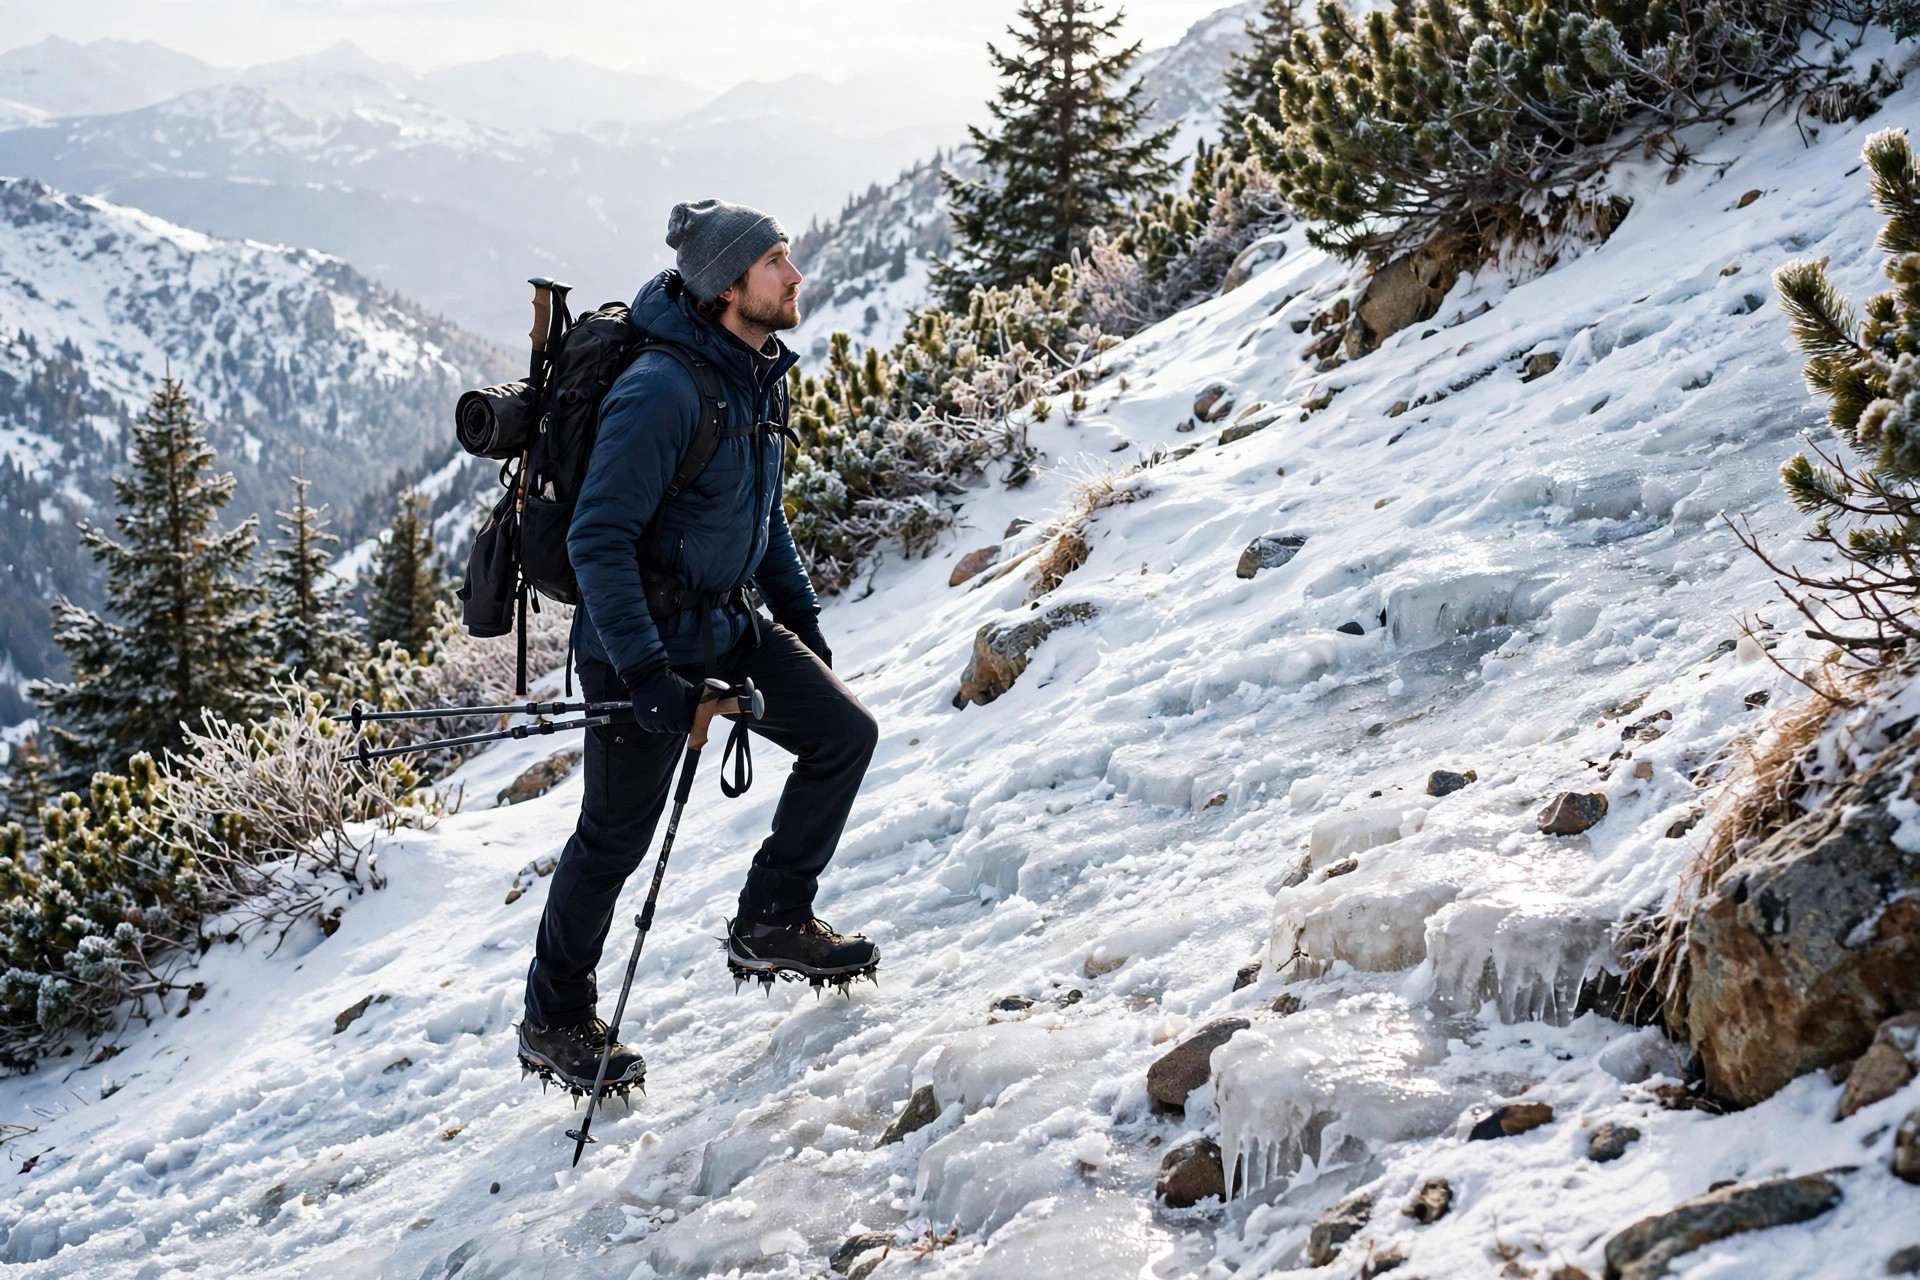
The right choice depends on the trail surface, not the calendar. A packed, well-trodden trail on flat ground needs only winter boots with deep lugs and waterproof insulation. Microspikes are the answer for ice and hard-packed snow, especially on freeze-thaw trails that melt by day and refreeze overnight. Their short metal points bite into ice on slopes where boot tread skates. They slip on and off in seconds, so carry them even if the trailhead looks clear, because shaded, north-facing sections hold ice long after sunny stretches melt out. Snowshoes solve a different problem: deep, fresh snow. Without them you posthole, sinking to the knee with each step, which is exhausting and tears up the trail for everyone behind you. If your boots sink more than a few inches on an unbroken trail, snowshoes or skis are the right tool, and turning around is a reasonable third option. For guidance on fit and sizing for the boots underneath all of this, our comparison of kids hiking shoes vs sneakers covers when insulated boots earn their place for younger hikers too. Children’s microspikes exist in small sizes, but check the fit at home first, since a loose device that twists underfoot is worse than none.
Plan Around Shorter Days
Winter daylight is the constraint most new winter hikers underestimate. In December and January, much of the northern United States gets nine to ten hours of daylight, and the sun drops behind ridges and tree cover well before the official sunset. Snow travel is also slower than summer hiking on the same trail, sometimes by a third, because of the surface and the layer stops. Start earlier than feels necessary and set a turnaround time before you leave the trailhead, based on the clock rather than on reaching a destination. A headlamp is mandatory even for a morning start, and it belongs on the standard list of ten essentials published by The Mountaineers, who developed the list. Run through your winter-ready hiking checklist the night before, charge the headlamp, and tell someone at home which trail you are hiking and when you expect to be back.
Keeping Water From Freezing
Water freezes from the top down, so carry bottles upside down in your pack. Ice then forms at the bottom of the bottle as you hold it, and the mouthpiece stays clear. An insulated sleeve slows freezing, and on very cold days starting with warm water buys extra hours. Store the bottle inside the pack, close to your back, rather than in an outside pocket. Hydration bladders are a poor choice in deep cold, because the drinking tube and bite valve freeze first, often within the hour. Wide-mouth bottles are easier to chip ice out of and refill from a thermos. Drink on a schedule rather than waiting for thirst, since cold suppresses thirst while dry air and hard breathing still pull moisture out of you.
Winter-Specific Risks for Kids
Children lose heat faster than adults because they have more skin surface relative to their size, and they often keep playing through the early stages of getting cold. Shorter outings are the simplest fix. A two-hour winter hike with a warm car waiting beats an ambitious loop that ends with a miserable final mile. Our guide to hiking with kids covers pacing and distance by age, and winter argues for the short end of every range in it. Check fingers, toes, and cheeks at every stop, and treat cold hands that do not warm up after a few minutes of movement as a turnaround signal. Pack more snacks than a summer hike of the same length, since staying warm burns calories and a fed child regulates temperature better than a hungry one. The American Hiking Society publishes seasonal guidance worth reviewing before a first family winter outing, including hypothermia symptoms such as fumbling hands, slurred speech, and unusual quietness in a normally chatty kid.
Frequently Asked Questions
How cold is too cold for a winter day hike with kids?
There is no single cutoff, but wind chill matters more than the thermometer reading. Many families set a limit around 15 to 20°F for younger children, lower it further on windy or exposed routes, and shorten the outing instead of canceling when the cold is borderline. If a child cannot keep hands and feet warm, the day is too cold for that child.
How do I keep my phone battery alive in the cold?
Cold slows the chemical reaction inside lithium batteries, so a phone can drop from 40 percent to dead in minutes at low temperatures. Carry it in an inside chest pocket where body heat keeps it warm, switch on airplane mode to reduce drain, and treat it as a backup to a paper map rather than your only navigation tool.
Do I need gaiters for a winter day hike?
Only if you expect deep snow. Gaiters keep snow out of the gap between boot and pant leg, which matters when you are breaking trail or postholing. On packed trails where your boots stay on top of the surface, they add warmth and fuss without solving a problem you actually have.
Pick the trail for the iciest mile and the earliest sunset, dress one layer warmer than the trailhead feels, and set the turnaround time before anyone is cold or tired.
Trail Etiquette for Families: Passing, Dogs, Bikes and Horses
The 10 Essentials for Day Hikes, Updated for Families