How to Read a Trail Map and Blazes With Your Kids7 min read
Hand a child a trail map at the trailhead and two things happen: they find the picture of the waterfall in about four seconds, and they have no idea what the squiggly lines mean. Both problems are fixable in one short hike. Learning how to read a trail map comes down to four things: the legend, the scale, contour lines, and the blazes painted on the trees that confirm the map in real life. Teach those, let your child lead short stretches, and the map stops being a folded mystery and becomes their job.
Start With the Legend and the North Arrow
Every map reading session should start at the legend, the box that explains what the symbols and line colors mean. On a park trail map, the legend tells you which line is your trail, which is a service road, and what the restroom, parking, and viewpoint icons look like. Kids who skip the legend navigate by guessing. Kids who read it first can usually find the trailhead, the parking lot, and the waterfall on their own within a minute.
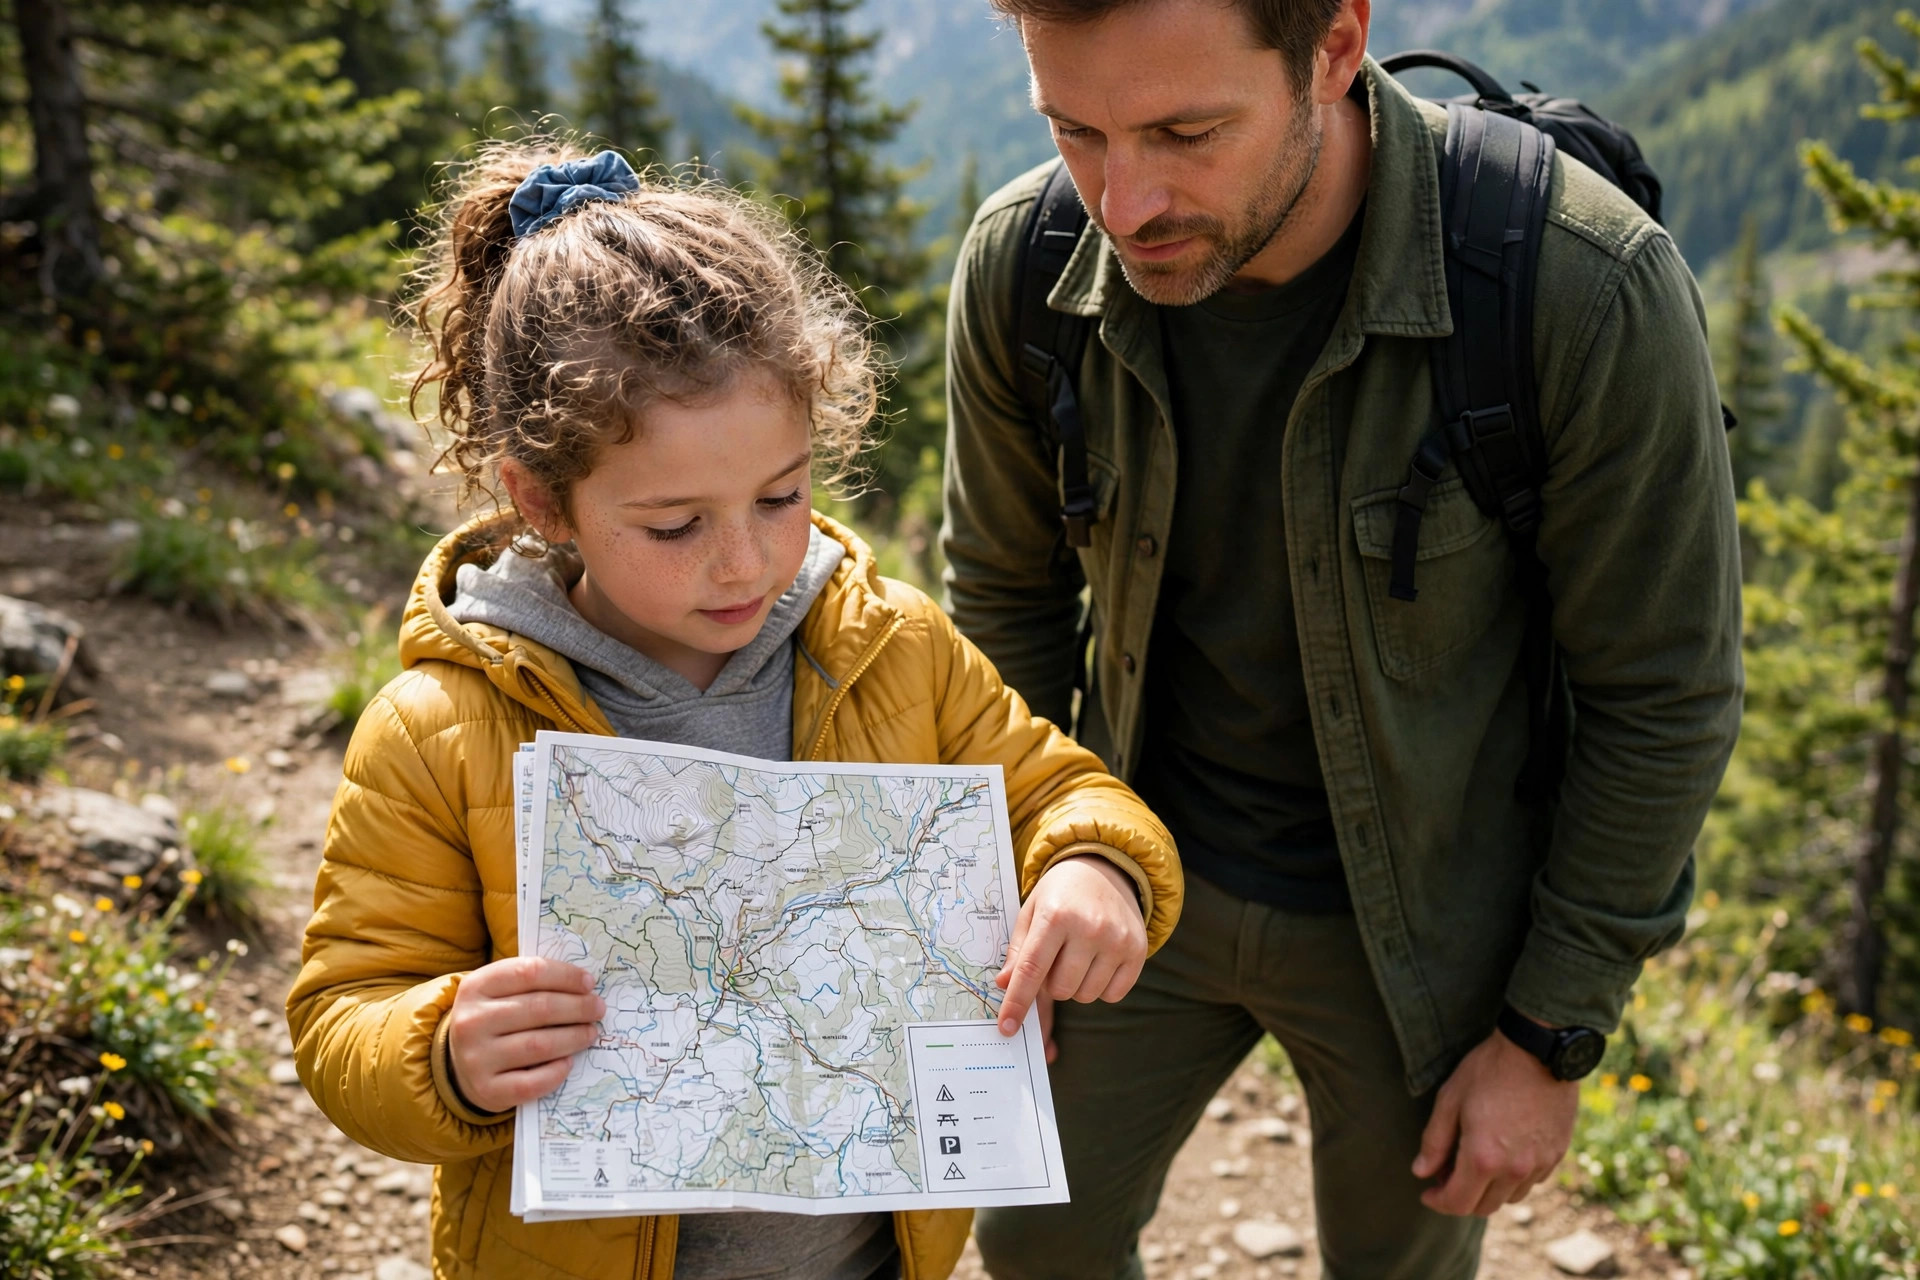
Next, find the north arrow and turn the map until the arrow points the same way you are facing. This one move, called orienting the map, fixes most beginner confusion. A map held the right way round lets a child match the curve of the trail ahead to the curve on the paper. A paper map belongs on any family hike, and ours rides in a zip bag on our hiking checklist so it survives rain and small hands.
Scale: Turning Inches Into Walking Time
Scale tells you how map distance converts to real distance. Trail maps often state it plainly, such as one inch equals half a mile, or show a bar scale you can measure with a thumb. Exact numbers matter less with kids than the translation into time. A mile on flat trail is roughly 25 to 30 minutes at a family pace with a seven-year-old, and longer uphill. Let your child do the measuring. Have them lay a thumb along the route to the next junction and announce how far it is and how long it should take. After two or three junctions, their estimates get noticeably better.
Contour Lines, Explained Simply
Contour lines are the brown squiggles that show the shape of the land. Each line connects points at the same height, so the lines themselves tell you little. The spacing does. Lines packed close together mean the ground rises or falls quickly. Lines spread far apart mean gentle ground that small legs can handle. Give kids the bathtub version: picture the hill sliced into flat layers, like the rings a draining bathtub leaves behind. A closed loop of lines is a hilltop. Lines that form a V pointing uphill usually mark a valley or a stream bed. Then test it: stop where the map shows lines crowding together and look up. The steep pitch in front of you is the one the map promised.
Trail Blazes: Paint Marks That Confirm the Map
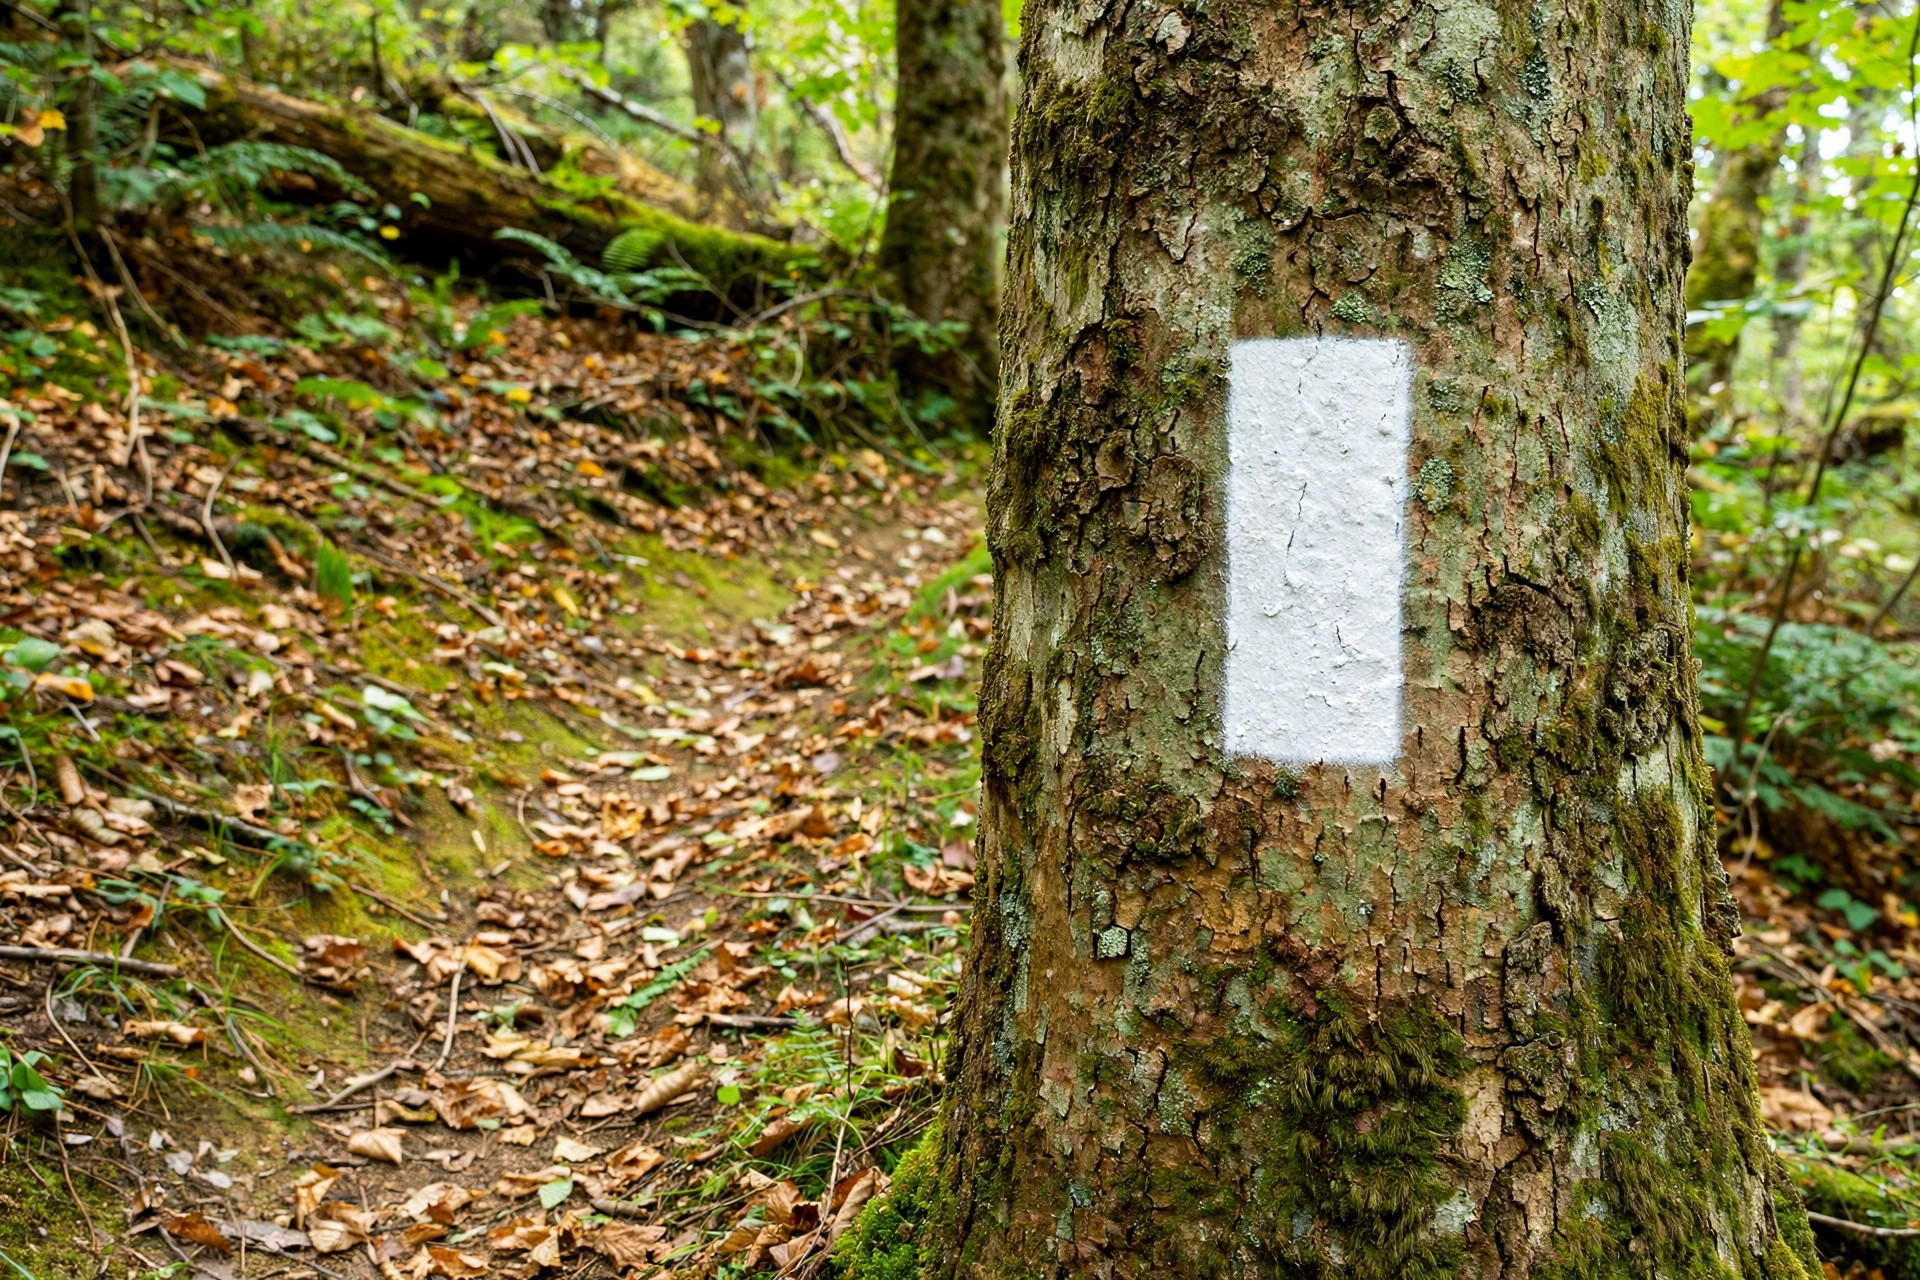
Blazes are painted marks on trees, posts, and rocks that confirm the map against the ground. The standard blaze is a rectangle of paint about 2 inches wide and 6 inches tall, placed at eye level facing the hiker. The best-known example is the white blaze of the Appalachian Trail, maintained by the Appalachian Trail Conservancy, but parks and forests use many colors, and the color usually identifies which trail you are on. A single blaze means the least dramatic thing in hiking: keep going, you are on the right trail. The one that matters is the double blaze. When you see two blazes and the top one is offset to one side, a turn is coming, and the higher blaze points the direction of the turn. If the upper blaze leans right, the trail turns right. Teach kids to call out turns when they spot a double blaze.
| What you see | What it means |
|---|---|
| Single blaze on a tree or post | Stay on this trail and keep walking straight |
| Two blazes, top one offset left or right | A turn is coming. The higher blaze points the way the trail turns |
| Two blazes stacked straight, or three blazes together | Marks a trail start, trail end, or spur junction on many systems. Check the legend, because this varies |
| A blaze in a new color | You have reached a junction with a different trail |
| No blaze after several minutes of walking | Stop. Look behind you for a blaze facing the other way, and if you see none, retrace to the last blaze you passed |
Blazes are painted for both directions, so a well-marked trail shows marks facing you whichever way you walk. If the blazes stop, the most common reason is a missed turn at a junction, not a vanished trail.
Trail Markers, Signs, and Cairns Are Different Tools
Blazes are only one kind of marker. Many parks nail small metal or plastic markers to trees instead of painting, and junctions often get signs with trail names and distances. Teach kids to read every sign out loud at a junction before anyone picks a direction. Cairns are stacks of rocks used to mark routes where there are no trees to paint. Follow them from one to the next, and never move, knock down, or build new ones. A cairn a visitor built for fun can send the next hiker the wrong way, and land managers ask hikers to leave cairns exactly as they find them. The US Forest Service manages many trails where cairns and markers do the wayfinding.
Let Your Kid Lead: Three Simple Navigation Habits
Skills stick when kids use them for real, so hand over the job in small pieces. Start with blaze spotting: your child walks in front and calls out each blaze. Graduate to junction duty, where the child reads the map at each junction and announces the turn before an adult confirms. The final step is a full lead stretch, a quarter mile where the child navigates and the adults follow, wrong turns included. Expect a wrong turn or two and treat them as the lesson rather than a failure. Retracing your steps to the last blaze is a real navigation skill. Our guide to hiking with kids covers pacing and distance by age. Keep a second copy of the map from our family hiking checklist in your own pack, so a lost or rain-soaked kid copy is a shrug, not a problem.
Phone Maps Are the Backup, Not the Plan
A phone is a useful second opinion and a poor primary navigator for teaching. Download the trail map for offline use before you leave home, because coverage disappears where trails live. Then put the phone away. A child watching a blue dot move learns to follow the dot. A child reading paper and hunting for blazes learns the trail. Keep the phone charged for the things it does best: calling for help in a real emergency, and confirming your position once if the paper map and the blazes disagree. Batteries die and cold drains power fast, which is why the paper map stays the plan.
Frequently Asked Questions
At what age can kids start learning to read a trail map?
Most kids can start at five or six with the basics: finding the trailhead, spotting symbols in the legend, and calling out blazes. Contour lines and scale usually click around eight to ten. Give younger kids one job at a time and add jobs as they ask for them.
Should my child carry their own copy of the map?
Yes. Print a second copy or pick up an extra park map at the trailhead and let your child carry it, mark it, and get it wet. A map that belongs to them gets studied. A map that an adult guards like a passport gets ignored. Their copy is also a backup if the main map is lost.
How can we practice map skills without going hiking?
Draw a simple map of your street, yard, or a local park together, with a legend and symbols you invent. Then walk it while your child navigates from the map, and finish by hiding a small object and marking an X for someone else to find.
How to Plan a First Family Hike: Distance and Elevation by Age

9 Hiking Essentials to Add to Your Hiking Checklist